In today’s fast-paced world, finding ways to maintain physical and mental well-being is more important than ever. Chair yoga offers a unique solution, enabling individuals to experience the benefits of yoga without the need for extensive mobility or flexibility. By integrating gentle movements and mindful breathing while seated, chair yoga can help improve strength, flexibility, and relaxation, making it an accessible practice for people of all ages and abilities. This blog will explore 15 chair yoga tips designed to support your journey, enhance your practice, and contribute positively to your mental health. Whether you’re a wellness enthusiast, a yoga aficionado, or seeking mental health services, these tips will help you enhance your practice and overall well-being.
1. Choose the Right Chair
Selecting the right chair is essential for a safe and effective chair yoga practice. Opt for a stable, comfortable chair that does not have wheels to prevent rolling or slipping during your movements. Ideally, the chair should have a flat seat with no armrests, which allows for full range of motion in your arms and legs. This open design helps you transition smoothly between poses. Additionally, ensure the chair is placed on a non-slip surface, like a yoga mat or carpeting, to provide extra stability and prevent any unexpected accidents that could disrupt your practice.
2. Create a Safe Space
Establishing a safe and serene environment is key to enjoying chair yoga. Designate a quiet area in your home where you can practice without interruptions. This space should have enough room surrounding the chair to allow for all movements, so you can extend your arms and legs freely. Clearing away any clutter will not only enhance your physical space but also contribute to a clearer mind. A yoga mat or soft carpet can offer cushioning for your feet, making your practice more comfortable. Creating a welcoming atmosphere might include adding personal touches like soft lighting or calming scents, further enhancing your focus on mindfulness and relaxation.
3. Practice Mindful Breathing
Breathing is essential in yoga and plays a vital role in enhancing your overall practice. To begin, find a comfortable seated position in your chosen chair, ensuring your back is straight and your feet are firmly planted on the floor. Close your eyes gently to minimize distractions, allowing yourself to turn your focus inward. Start by inhaling deeply through your nose, filling your lungs fully and allowing your abdomen to expand. Hold this breath for a moment, feeling the fullness in your body. Then, slowly exhale through your mouth, releasing any tension and stress with each breath out.
Repeat this deep breathing exercise for several minutes, focusing on the rhythm of your breath. As you inhale, visualize positivity and energy entering your body; as you exhale, imagine letting go of any negativity or distractions. To deepen the practice, try counting each breath. Inhale for a count of four, hold for a count of four, and exhale for a count of six or eight. This technique not only helps to center your mind and body but also cultivates mindfulness, reducing anxiety and enhancing your emotional well-being. Incorporating mindful breathing into your chair yoga routine will create a solid foundation and enhance your ability to connect with your inner self during your practice.
4. Try Diaphragmatic Breathing
Diaphragmatic breathing, also known as abdominal or belly breathing, is a powerful technique that can significantly enhance your relaxation and mindfulness practice. To begin, find a comfortable seated position or lie down on your back, ensuring that your body is fully supported. Place one hand on your chest and the other on your abdomen. This will help you gauge your breathing technique and ensure that you are engaging your diaphragm rather than your chest muscles.
Inhale deeply through your nose, focusing on allowing your abdomen to rise while keeping your chest relatively still. As you breathe in, imagine filling your lungs with air from the bottom upwards, engaging your diaphragm fully. You should feel your stomach expand outward, while your chest remains calm. Hold this breath for a moment, experiencing the fullness and the gentle stretch in your diaphragm.
Now, exhale slowly through your mouth, allowing your abdomen to lower as you release the breath completely. Envision any tension or stress leaving your body with each exhalation. Repeat this process for several cycles, gradually extending the length of your inhalations and exhalations—aim for a count of four for the inhale, a brief pause, and a count of six or seven for the exhale.
Practicing diaphragmatic breathing not only promotes relaxation but also helps activate the body’s parasympathetic nervous system, reducing feelings of stress and anxiety. Integrating this technique into your chair yoga routine will deepen your ability to connect with your body and mind, creating a more profound sense of peace and awareness during your practice.
5. Gentle Neck Rolls
Start your practice with gentle neck rolls to loosen up and release any tension in the neck and shoulders. Begin by sitting up straight in your chair with your feet flat on the ground and your hands resting comfortably on your thighs. Lower your chin to your chest, allowing your head to hang naturally and feeling the gentle stretch along the back of your neck.
From this position, slowly roll your head to the right, bringing your right ear toward your right shoulder. Pause for a moment to feel the stretch on the left side of your neck and take a deep breath in as you hold the position. Then, continue the roll by moving your head back, allowing your chin to rise towards the ceiling. Feel the stretch across the front of your neck and throat.
Next, gently roll your head to the left, bringing your left ear toward your left shoulder. Again, pause to savor the stretch, and take a deep breath in. Finally, return your head to the starting position with your chin at your chest.
Repeat this sequence several times, moving slowly and gracefully to avoid any strain. Focus on your breath throughout the movement, using your inhales to lengthen and create space in your neck and your exhales to deepen the relaxation. Incorporating gentle neck rolls into your routine not only alleviates tension but also promotes better mobility and alignment in your spine.
6. Shoulder Shrugs
Shoulder shrugs are a simple yet effective way to relieve tension in the shoulders and neck while promoting better circulation. To start, sit comfortably in your chair with your back straight and feet planted flat on the ground. Allow your hands to rest gently on your thighs. Inhale deeply through your nose, expanding your chest and allowing your shoulders to rise towards your ears. Hold this position for a moment to fully engage the muscles in your shoulders and neck.
As you exhale through your mouth, release your shoulders and roll them back and down in a smooth, circular motion. As your shoulders relax into this new position, feel the tension melting away. It’s helpful to visualize your shoulders sinking down, creating space in your neck and upper back. Repeat this sequence for several breaths, performing about 5 to 10 shoulder shrugs.
To further enhance the benefits, try gradually increasing the range of motion with each shrug. With each inhalation, lift your shoulders higher towards your ears, and with each exhalation, roll them back with more intention. This mindful movement not only alleviates physical tension but also encourages awareness of your body, fostering a deeper connection between movement and breath. After completing the shrugs, take a moment to notice how your shoulders feel; you may find a newfound sense of lightness and relaxation.
7. Seated Cat-Cow Stretch
The Seated Cat-Cow Stretch is a fantastic exercise to enhance spinal mobility and relieve tension in the back and neck. To begin, sit comfortably in your chair with your feet flat on the ground, ensuring your back is straight and your shoulders are relaxed. Place your hands gently on your knees.
As you inhale deeply through your nose, arch your back by lifting your chest and looking upwards, entering Cow Pose. This position promotes a gentle extension of your spine, opening up the chest and encouraging positive energy flow. Allow your shoulders to drop away from your ears, creating more space in your upper body.
Next, exhale slowly through your mouth as you transition into Cat Pose. Begin to round your spine, tucking your chin towards your chest and drawing your belly button in towards your spine. Visualise the curve of a cat’s back, feeling the stretch in your upper back as you engage your core muscles.
Continue this flowing movement, alternating between Cow Pose and Cat Pose for several breaths. Aim for a slow and deliberate pace, synchronizing each movement with your breath. With each inhale, deepen the arch in your back, and with each exhale, draw in and round the spine further. This mindful practice not only mobilizes the spine but also fosters a sense of calm and connection with your body, promoting relaxation and alleviating stress. After completing a few cycles, take a moment to notice the sensations in your back and neck, appreciating the newfound flexibility and ease within your body.
8. Seated Forward Bend
To begin the Seated Forward Bend, find a comfortable seated position on your mat or a soft surface, ensuring your legs are extended straight in front of you with your feet flexed. Sit tall, lengthening your spine by gently rolling your shoulders back and down. Take a deep inhale through your nose, drawing awareness to your breath and grounding yourself in the present moment.
As you exhale slowly, begin to hinge at your hips, leading with your chest as you fold forward. It’s important to initiate the movement from the hips rather than the lower back to avoid strain. Aim to keep your spine as long as possible, allowing your torso to descend towards your legs. With each breath, envision your body softening and releasing any tension as you deepen the stretch.
Depending on your flexibility, you may reach for your feet, shins, or the floor with your hands. If your hands do not reach your feet, it’s perfectly fine; simply hold onto your knees or thighs, keeping a gentle bend in your elbows. Focus on maintaining an elongated spine rather than rounding your back. Allow your head to hang heavy, and breathe deeply into any sensations you may feel in the back and hamstrings.
Hold this pose for several deep breaths, allowing yourself to relax and explore the stretch. With each inhale, draw in fresh energy; with each exhale, let go of any tightness or stress. When you are ready to release the pose, slowly rise back to an upright position, bringing your arms overhead for an added stretch before returning to a neutral seated posture. Take a moment to notice how this gentle stretch has affected your body and mind.
9. Seated Spinal Twist
To begin the Seated Spinal Twist, start in a comfortable seated position with your legs extended in front of you, grounding your sit bones into the mat or floor. Bend your right knee and place your foot flat on the ground, then gently cross your right leg over your left thigh, placing your right foot outside your left knee. This foundational position promotes stability while preparing for the twist.
Next, place your right hand on your left knee, using it as leverage to assist the twist. Your left hand should then be positioned behind you on the seat or the mat, fingers pointing away as you find a firm base. Inhale deeply, focusing on lengthening your spine; imagine drawing energy from the root of your spine all the way to the crown of your head. This elongation is crucial as it allows for a healthier twist, reducing strain on your back.
As you exhale, gently twist your torso to the left, turning your head in the same direction. Keep your chest open and shoulders relaxed away from your ears. It’s essential to ensure that the movement comes from your waist and not just your neck, allowing your spine to rotate naturally. Hold this position for a few breaths, breathing deeply into the space created in your torso, and noticing any sensations or releases in your back and abdomen.
After several breaths, return to the center by inhaling, lengthening your spine once again, and exhale as you prepare to switch sides. Repeat the twist on the right side by placing your left hand on your right knee and your right hand behind you. This twist not only rejuvenates the spine but can also aid digestion by massaging the internal organs. Remember to practice this pose mindfully and gently, allowing your body to guide the depth of the twist.
10. Seated Pigeon Pose
To get into Seated Pigeon Pose, start by positioning your right ankle on your left knee in a figure-four shape. Ensure that your right knee is pointing out to the side while keeping the left leg extended straight in front of you. Sit up tall with your spine aligned and engage your core to maintain stability. As you hinge forward from your hips, aim to keep your back straight, avoiding any rounding in the lower spine. Going deeper into the pose may involve bending at the waist while keeping your shoulders relaxed and away from your ears. This action allows for a gentle stretch in the right hip and glute area, effectively opening the hips and providing relief from lower back pain. Hold the pose for several deep breaths, feeling the release of tension and allowing your body to relax into the stretch.
11. Seated Eagle Pose
In Seated Eagle Pose, begin by wrapping your right arm under your left arm, creating a double-hug position with your forearms. If possible, press your palms together at the center, but don’t force it; if your palms don’t touch, just rest them as close as comfortably achievable. Next, lift your elbows to shoulder height to deepen the stretch in your upper back and shoulders. For your legs, cross your right leg over your left, hooking the right foot behind the left calf if you can. This configuration will enhance the opening in your lower back and hips while also engaging your core. Sit tall and maintain a steady breath as you hold the pose, allowing each exhale to help melt any tension away. Displaying compassion toward yourself and your limits is crucial; only go as deep into the pose as feels right for you. Hold for several breaths before slowly unwinding from the pose, feeling the invigorating effects on your body.
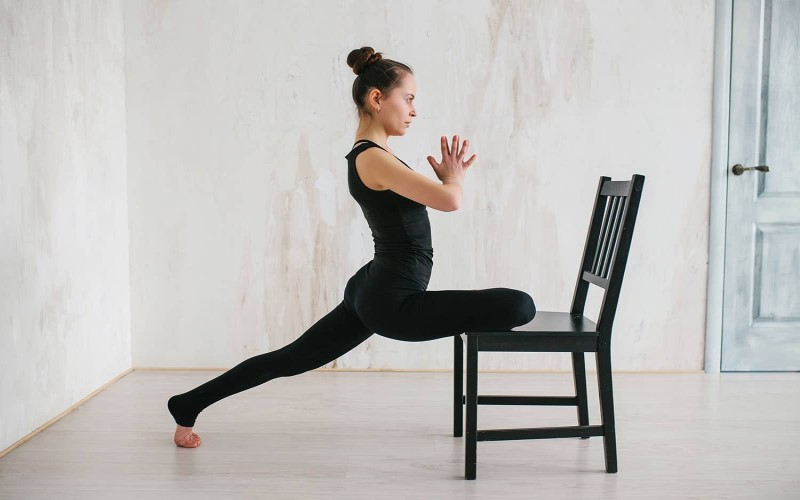
12. Seated Warrior II
To transition into Seated Warrior II, start by sitting on the edge of your seat, ensuring that your spine is erect. Extend your right leg out to the side, keeping it straight while your left knee bends to form a 90-degree angle. Your left foot should be firmly planted on the ground, helping to provide stability. It’s important to keep your left knee directly above your ankle to avoid any strain.
As you extend your arms, raise them parallel to the floor, with your palms facing down, spreading them wide to create a sense of openness in your chest. Your shoulders should be relaxed, away from your ears. Focus your gaze over your left hand, which is crucial for maintaining balance and concentration. Engage your core muscles to provide additional stability and support.
Hold this pose for several breaths, feeling the strength in your legs and the stretch across your arms and chest. Remind yourself to breathe deeply, inhaling confidence and exhaling any tension. This pose not only strengthens the legs but also improves overall balance and promotes a sense of empowerment. To exit the pose, slowly lower your arms and gently bring your right leg back into a seated position before moving onto the next posture.
13. Seated Tree Pose
To enter the Seated Tree Pose, begin by sitting comfortably on the edge of your seat with an erect spine. Start by placing the sole of your right foot on the inside of your left leg, choosing either above or below the knee, ensuring that your foot is positioned in a way that does not put undue pressure on the joints. If balancing on your foot is challenging, feel free to rest it against your ankle or calf instead.
Once you have secured your foot in place, bring your palms together at your heart center, maintaining a gentle but firm connection. This gesture not only helps to ground you but also encourages mindfulness and focus. As you sit tall, engage your core muscles to enhance your stability and prevent any wobbling.
With each breath in, imagine drawing in energy and strength from the earth through your left leg, while with each breath out, release any tension you’re holding in your body. Focus your gaze on a fixed point in front of you to further improve your balance and concentration. This pose not only cultivates physical equilibrium but also nurtures mental clarity and calm. Remain in this pose for several breaths, feeling the connection between your body and the ground, before gently lowering your right foot back to the ground and returning your hands to your lap.
14. Seated Side Bend
To begin the Seated Side Bend, sit comfortably on the edge of your chair, ensuring that your back is straight and your feet are firmly planted on the floor. Take a moment to take a few deep breaths, grounding yourself and preparing your body for the stretch ahead.
Lift your right arm overhead, reaching towards the ceiling as you extend your fingertips. As you do this, engage your core to maintain stability and support your spine. Once your right arm is fully extended, gently lean your torso to the left. You can place your left hand on the side of your chair for support, allowing your body to elongate through the right side.
As you lean, ensure that your shoulders remain relaxed and away from your ears. This stretch is designed to lengthen the side body, promoting flexibility while opening your ribcage to allow for deeper breaths. Hold this position for several breaths, feeling the stretch deepen with each exhale. Visualize the breath flowing into the right side of your body, creating space and releasing any tension.
After holding the pose, slowly return to an upright position, lowering your right arm back to your side. Take a moment before transitioning to the other side by repeating the same steps, lifting your left arm overhead and leaning to the right. Remember to maintain awareness of your body, focusing on the sensations and the calming effects of the stretch.
15. Seated Relaxation
To perform the Seated Relaxation, begin by finding a comfortable chair that provides good support for your back. Sit with your feet flat on the floor, shoulder-width apart, ensuring that your weight is evenly distributed. Place your hands gently on your thighs, palms facing down or relaxed upwards, according to your comfort.
Once you’ve settled into your position, close your eyes softly. Take a moment to tune into your body and acknowledge any areas of tension you may be carrying. Inhale deeply through your nose, allowing your abdomen to expand fully. Hold this breath for a moment, then exhale slowly through your mouth, consciously releasing any tightness. Repeat this breathing pattern several times, letting each exhalation guide you deeper into relaxation.
As you continue to breathe, begin to scan your body from head to toe. Notice how your forehead softens, your shoulders drop away from your ears, and your back lengthens. Allow each part of your body to feel heavy and grounded, sinking deeper into your chair. With every inhale, visualize a wave of calm washing over you, and with each exhale, feel tension melting away.
Remain in this tranquil state for several minutes, focusing on the rhythm of your breath. If your mind begins to wander, gently bring your focus back to your breathing, grounding yourself in the present moment. This practice not only promotes relaxation but also enhances your overall sense of well-being. When you feel ready, slowly open your eyes, bringing your awareness back to your surroundings, and take a moment before resuming your day.
Conclusion
Make chair yoga a part of your daily routine. Even a few minutes of practice can greatly improve your mental and physical well-being. For those seeking mental health counseling, incorporating chair yoga can be a valuable adjunct to traditional therapy methods.
Chair yoga offers a plethora of benefits, making it accessible to people of all ages and fitness levels. By integrating these 16 tips into your daily routine, you can experience enhanced flexibility, reduced stress, and improved overall health. Ready to take your practice to the next level? Discover our range of mental health services and join our community for more wellness inspiration.